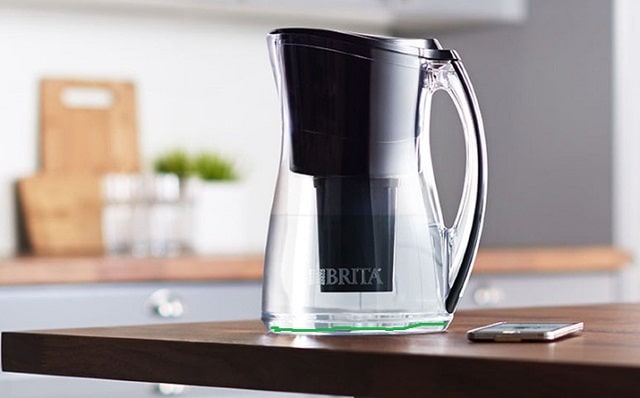

Purchasing a Brita or PUR filtered pitcher, if bought on sale or filters in bulk, can be a frugal way to improve your health and save money on bottled water. Bottled water can be quite expensive, leads to major pollution if not recycled, and most can become contaminated with BPA. That is as long as the Brita green pitchers and filters stay clean as well and avoid bacterial buildup at home or in the workplace for 2024 and 2025!
BOOST YOUR HEALTH AND WEALTH WITH THIS COMPANY
Dirty Water Needs Filtration
As we learned from Flint Michigan, you can't always trust your town, city, state, or country to provide you with clean water. All public water has some amount of dissolved solids, impurities, and chemicals added and some tap water tastes or smells like chlorine. It could be contaminated with bacteria or viruses and even tainted by antibiotics.
Dirty Water Needs Filtration
As we learned from Flint Michigan, you can't always trust your town, city, state, or country to provide you with clean water. All public water has some amount of dissolved solids, impurities, and chemicals added and some tap water tastes or smells like chlorine. It could be contaminated with bacteria or viruses and even tainted by antibiotics.
The quality of our public tap water also seems to have worsened while everyone is distracted and allocating resources to the Covid-19 pandemic. Throughout Coronavirus, your local tap water seems more chlorinated and metallic than ever before. A lot of town and city water suppliers haven't changed their chemical treatments since this health crisis occurred, even in 2025.
The future of our public water supply will end up being recycled waste water (sewage) and obviously no amount of industrial filtration will clean it 100% before it goes from faucet to mouth, especially with limited budgets. Over the years there has become an increased contamination of water with prescription medications, nano-plastics, fertilizers, heavy metals, and a number of other unpleasant things. If that isn't grim enough, our drinking water situation is even more dire with public water supplies able to be hacked or contaminated by various nefarious groups.
When it comes down to it, you never really know what someone has done or hasn't done to your water before you drink it.
Not All Water Filters Work Well, Or At All
Lately there have been more studies coming out about water filters not purifying water, or misleading customers to believe it is more effective than not. There are even class action law suits against Brita for not removing enough toxins and chemicals in our drinking agua. Insanely expensive premium water filters have no popped up such as AkuaPure, Enagic Kangen, Klir, or MSE that are thousands of dollars or more in cost!
So with all that being said, a couple of years ago I decided to start using a Brita filtered pitcher again after reading countless reports on contaminated town water nationwide or worldwide. I had previously used Brita or PUR filtered pitchers or faucet filters for a few months at a time before giving up on them.
I know Brita and PUR water filters don't solve all the issues with drinking water, but I figured it would be better than nothing and worth the minimal investment. Especially after reading about all of the contaminated public water in this country and worldwide (it is not just Flint Michigan dealing with this!).
Why Is My Brita Pitcher Green And Gross?
But one day I woke up and saw a greenish yellow tint on the bottom of the Brita water pitcher. At first I thought it was just a green reflection of the dirty bottom of the Brita pitcher from being on our counter or fridge countless times.
So with all that being said, a couple of years ago I decided to start using a Brita filtered pitcher again after reading countless reports on contaminated town water nationwide or worldwide. I had previously used Brita or PUR filtered pitchers or faucet filters for a few months at a time before giving up on them.
I know Brita and PUR water filters don't solve all the issues with drinking water, but I figured it would be better than nothing and worth the minimal investment. Especially after reading about all of the contaminated public water in this country and worldwide (it is not just Flint Michigan dealing with this!).
Why Is My Brita Pitcher Green And Gross?
But one day I woke up and saw a greenish yellow tint on the bottom of the Brita water pitcher. At first I thought it was just a green reflection of the dirty bottom of the Brita pitcher from being on our counter or fridge countless times.
But unfortunately that green slime was bacteria, green algae, and sediment buildup. Needless to say I was a little disturbed and shocked at the green slime and overall contamination. I did a little research and it turns out that this green algae buildup has been a common occurrence for many people over the last decade or more. So to help you avoid this strange and unhealthy situation, I have compiled a simple yet comprehensive list to help keep you healthy prevent this from happening to you and your Brita water filters:
Get rid of the green slime and stuff floating around! Here are my 10 top suggestions to keep your Brita or PUR pitchers clean (instead of green) and healthy without algae or bacteria buildup:
10 Steps To Avoid Green Algae And Bacteria Contamination In Brita Filter Pitcher or PUR Pitchers
1) Wash Your Hands And The Brita Water Filter Before Use
Wash each Brita filter under cold water for 1 minute after opening and before adding it to the pitcher. The instructions say 15 seconds but I would recommend going a little longer just to be on the safe side. And wash your hands prior to washing the filter so you don't get bacteria all over it prior to placing it in your pitcher!
2) Keep A Tight Seal On Top Of Brita Pitcher
Make sure the top of the Brita water pitcher, including the cover of the spout, is closed and forms a tight seal with the rest of the pitcher. You don't want dust, food particles, or worse to get into your water because of a loose top. This happens a lot more often than you expect, especially if you have kids and pets!
3) Wash Out Brita Pitcher Often And Rinse Well
Wash Brita or PUR pitcher out at least every 30 days. You can use some dish soap or just throw it in the dishwasher for even better results. Try to use organic, natural, or additive free soaps to help minimize contamination with chemicals. Rinse out thoroughly to avoid residue or any other contaminants. Sometimes it takes weeks or months for any bacteria to accumulate to significant levels so washing it out consistently will keep it under control. If you have well water instead of town water then you should probably wash it out even more often.
4) Keep The Brita Pitcher Refrigerated
Keep the Brita or PUR filtered water pitcher in the refrigerator when you're not using it. I have gotten lazy many times and kept the pitcher next to our sink instead of putting it back in the fridge, but keeping it cool helps to reduce or prevent bacterial or algae buildup in the water.
5) Don't Drink Directly From The Brita Pitcher!
Don't drink directly from the Brita or PUR pitcher! This seems like common sense, and difficult to do with most of the pitchers, but there are still plenty of people that drink from the milk carton or reuse plastic water bottles for weeks on end. This is never a good idea.
6) Change Your Brita Water Filter Often
Change your Brita or PUR filter as often or more often than the recommended amount. When filters get clogged with sediment and other particles then they can become breeding grounds for bacteria and algae, which will reduce the filtering abilities even further. When your filter sensor light gets to yellow it is time to swap in a new one. This will unfortunately end up costing you a few extra dollars but it is worth it and if you buy the filters in bulk you will be fine.
7) Dump The First 1-2 Fillups For Each Brita Filter Used
This one is important and not always followed. In addition to watching out for green algae and bacteria in your Brita filtered water after a lot of filter use, be on the lookout for black charcoal particles in the first couple of pitcher fill-ups. While Brita claims these black charcoal particles are harmless, it is obviously unhealthy to drink black charcoal. You would have to be an idiot to believe that drinking any amount of charcoal is fine, even though charcoal itself isn't a toxin. Apparently they want you to pour out the first two fill-ups that your Brita filter creates to avoid this charcoal dust contamination. That is all well and good, but it uses up part of the filter and wastes some water right off the bat if you follow these instructions.
8) Consider Switching To Zero Water Filters And Pitchers
Consider switching to a Zero Water filtered pitcher instead of a Brita Filter. While it might be a little more expensive than a Brita or PUR pitcher, with its 5-step filter it does a better job of filtering out dissolved solids and there is a lower chance of green algae, mold, black charcoal particles, sediment, stains, or other bacterial buildup in your pitcher or the filters themselves.
After months of using Zero Water over Brita filtered pitchers, I haven't noticed any green slime, bacteria buildup, or other stuff floating around in my water (even when I haven't been religious about cleaning it or keeping it in the refrigerator). But any water filter or filtered pitcher can produce bacteria growth or have charcoal floating around, so buyer beware!
Get rid of the green slime and stuff floating around! Here are my 10 top suggestions to keep your Brita or PUR pitchers clean (instead of green) and healthy without algae or bacteria buildup:
10 Steps To Avoid Green Algae And Bacteria Contamination In Brita Filter Pitcher or PUR Pitchers
1) Wash Your Hands And The Brita Water Filter Before Use
Wash each Brita filter under cold water for 1 minute after opening and before adding it to the pitcher. The instructions say 15 seconds but I would recommend going a little longer just to be on the safe side. And wash your hands prior to washing the filter so you don't get bacteria all over it prior to placing it in your pitcher!
2) Keep A Tight Seal On Top Of Brita Pitcher
Make sure the top of the Brita water pitcher, including the cover of the spout, is closed and forms a tight seal with the rest of the pitcher. You don't want dust, food particles, or worse to get into your water because of a loose top. This happens a lot more often than you expect, especially if you have kids and pets!
3) Wash Out Brita Pitcher Often And Rinse Well
Wash Brita or PUR pitcher out at least every 30 days. You can use some dish soap or just throw it in the dishwasher for even better results. Try to use organic, natural, or additive free soaps to help minimize contamination with chemicals. Rinse out thoroughly to avoid residue or any other contaminants. Sometimes it takes weeks or months for any bacteria to accumulate to significant levels so washing it out consistently will keep it under control. If you have well water instead of town water then you should probably wash it out even more often.
4) Keep The Brita Pitcher Refrigerated
Keep the Brita or PUR filtered water pitcher in the refrigerator when you're not using it. I have gotten lazy many times and kept the pitcher next to our sink instead of putting it back in the fridge, but keeping it cool helps to reduce or prevent bacterial or algae buildup in the water.
5) Don't Drink Directly From The Brita Pitcher!
Don't drink directly from the Brita or PUR pitcher! This seems like common sense, and difficult to do with most of the pitchers, but there are still plenty of people that drink from the milk carton or reuse plastic water bottles for weeks on end. This is never a good idea.
6) Change Your Brita Water Filter Often
Change your Brita or PUR filter as often or more often than the recommended amount. When filters get clogged with sediment and other particles then they can become breeding grounds for bacteria and algae, which will reduce the filtering abilities even further. When your filter sensor light gets to yellow it is time to swap in a new one. This will unfortunately end up costing you a few extra dollars but it is worth it and if you buy the filters in bulk you will be fine.
7) Dump The First 1-2 Fillups For Each Brita Filter Used
This one is important and not always followed. In addition to watching out for green algae and bacteria in your Brita filtered water after a lot of filter use, be on the lookout for black charcoal particles in the first couple of pitcher fill-ups. While Brita claims these black charcoal particles are harmless, it is obviously unhealthy to drink black charcoal. You would have to be an idiot to believe that drinking any amount of charcoal is fine, even though charcoal itself isn't a toxin. Apparently they want you to pour out the first two fill-ups that your Brita filter creates to avoid this charcoal dust contamination. That is all well and good, but it uses up part of the filter and wastes some water right off the bat if you follow these instructions.
8) Consider Switching To Zero Water Filters And Pitchers
Consider switching to a Zero Water filtered pitcher instead of a Brita Filter. While it might be a little more expensive than a Brita or PUR pitcher, with its 5-step filter it does a better job of filtering out dissolved solids and there is a lower chance of green algae, mold, black charcoal particles, sediment, stains, or other bacterial buildup in your pitcher or the filters themselves.
After months of using Zero Water over Brita filtered pitchers, I haven't noticed any green slime, bacteria buildup, or other stuff floating around in my water (even when I haven't been religious about cleaning it or keeping it in the refrigerator). But any water filter or filtered pitcher can produce bacteria growth or have charcoal floating around, so buyer beware!
9) Buy A New Filtered Water Pitcher
Sometimes a plastic container is just too far gone to resuscitate, whether it is a Brita water filter pitcher or another brand. Over time plastic starts to corrode or chemicals get embedded into the plastic and you just can't clean it 100%. To avoid green algae, charcoal dots, bacteria, viruses, and nano chemical contamination sometimes it is best to just buy a new one and start over again. It is a little wasteful but they are very cheap, $10-20 per pitcher, so it is a viable option after many months or years of use.
10) Purchase A New Kitchen Faucet
When it comes to drinking cleaner water, sometimes it starts at the source. It is only logical that purchasing a new faucet will give you cleaner and healthier water. Over time your old faucet will accumulate minerals, rust, bacteria, heavy metals, and other chemicals that will contaminate your drinking water before you poor it into your filtered pitcher. Just make sure to run water through your new water faucet for a few minutes to clear out any chemicals or residue from the manufacturing or packaging process.
By this logic you would also ideally want to replace your old pipes and plumbing in general, but that is a lot less feasible. It is more realistic to spend $100-200 on a new kitchen faucet than thousands of dollars on pipes throughout your home, and some pipes that you can't even replace that attach to your town or city water supply. If your home has very old and decrepit pipes, you may want to consider replacements eventually though.
This is probably the most extreme option to improve the quality of your drinking water with or without a water filter containing a pitcher, but it can certainly help reduce bacteria and sediment buildup overall in 2024-2025.
Bacteria Growth In Water Filters vs Tap Water Impurities: The Choice Is Yours
Choosing between tap impurities and filter bacterial growth is not a great choice to make for your water consumption. But you have to decide on potential bacteria growth in your water filters or pitchers (even if you follow all of these tips) along with the cost of filters versus the toxins that could be contained in your tap water and pipes. It depends on your budget, quality of local tap or well water, how old your pipes are, how often you can change your filters, and how diligent the users will be with the filtered pitchers.
Keep It Clean And Avoid Filtered Water Contamination
Follow these simple instructions and it will keep your Brita and PUR pitchers clean and enhancing your health instead of becoming detrimental to it! Stay green with your recycling and waste reduction practices but don't drink the green. You must boost your water's wellness and family's wellbeing. Keep that contamination out of your drinking water and avoid the green algae slime during your daily hydration.
Keep It Clean And Avoid Filtered Water Contamination
Follow these simple instructions and it will keep your Brita and PUR pitchers clean and enhancing your health instead of becoming detrimental to it! Stay green with your recycling and waste reduction practices but don't drink the green. You must boost your water's wellness and family's wellbeing. Keep that contamination out of your drinking water and avoid the green algae slime during your daily hydration.
I hope you enjoyed this article about how to keep your water filtering pitchers safe, clean and effective on a budget.
Interested in more articles about healthier water and hydration?
Read My Blog Posts:
- How To Stay Hydrated On A Budget
- Tips To Stay Hydrated & Fueled For Workout Performance
More Frugal Fitness Facts Below